今回も第3弾として背景の描画を4つ追加してアプリを更新しました(^0^)/
前回同様、今回もその背景のサンプルコードとスクリーンショットを載せていきます(´・ω・`)
画像の容量を節約しつつクールな背景画像として利用できればと思いますので、
参考にオリジナルの背景としてアプリにご利用いただければうれしいです☆
画像の容量を節約しつつクールな背景画像として利用できればと思いますので、
参考にオリジナルの背景としてアプリにご利用いただければうれしいです☆
アプリ

まずは、再度サンプルアプリを紹介します。
今回紹介する背景も追加してアップデート済みですので、まずはお試しください(^0^)/♪
背景パターン(今回追加分)
前回までの10の背景パターンに加えて、以下の4つの背景パターンをアプリに追加しました。今回は多少実用的な背景ができたので、テーマをつけて紹介します。
□雨あと
・多数の線と円の模様(2色、半透明)
□四角模様(左下)
・多数の四角形をちりばめた模様(2色、半透明)
□四角模様(上下)
・多数の四角形をちりばめた模様(カラフル、半透明)
□四角模様(真ん中)
・多数の四角形をちりばめた模様(1色、半透明)
雨あと

雨が降って波紋が広がるような画の背景です。
まず線をランダムに描画して、2色の円を右下の方に描画しています。
ランダムに取得したX座標とY座標が左上の座標(0,0)の半径240pxの円の範囲内に入らないようにして描画しています。
 // 線と円の描画
 public void DrawBackground011(Canvas csCanvas)
 {
  Random rand = new Random();

  Paint csPaint = new Paint();
  csPaint.setAntiAlias(true);
  csPaint.setColor(Color.argb(128+rand.nextInt(80),rand.nextInt(256),rand.nextInt(256),rand.nextInt(256)));

  RectF sOval = new RectF();
  for(int x=0; x<=320; x+=20)
  {
   if(x==160) csPaint.setColor(Color.argb(128+rand.nextInt(80),rand.nextInt(256),rand.nextInt(256),rand.nextInt(256)));
   for(int y=0; y<=320; y+=80)
   {
    int nX = 0, nY = 0;
    boolean bLoop=true;
    while(bLoop)
    {
     nX = rand.nextInt(320);
     nY = rand.nextInt(320);
     if(240 < Math.sqrt(nX*nX+nY*nY)) bLoop = false;
    }
    int nSize = rand.nextInt(30)+10;
    sOval.set(nX, nY, nX+nSize, nY+nSize);
    csCanvas.drawOval(sOval, csPaint);
   }
   int nX = rand.nextInt(320);
   int nY = rand.nextInt(320);
   int nSize = rand.nextInt(40);
   csCanvas.drawLine(nX, nY, nX+nSize, nY+nSize, csPaint);

  }

 }
四角模様(左下)

こちらは良い名前が思いつかなかったので、良いタイトルがあればコメントください(^^;
今度は四角形を左側と下側に列を作って描画しています。
微妙にずらしながら左側は上から下に、下側は左から右に色を変えて描画しています。
背景として使うには少し物足りない気がします(´・ω・`)
 // 四角形の描画
 public void DrawBackground012(Canvas csCanvas)
 {
  Random rand = new Random();

  int nColor01 = Color.argb(128+rand.nextInt(80),rand.nextInt(256),rand.nextInt(256),rand.nextInt(256));
  int nColor02 = Color.argb(128+rand.nextInt(80),rand.nextInt(256),rand.nextInt(256),rand.nextInt(256));
  Paint csPaint = new Paint();
  csPaint.setAntiAlias(true);
  csPaint.setColor(nColor01);

  RectF sRect = new RectF();
  int x=20;
  {
   for(int y=0; y<=320; y+=10)
   {
    csPaint.setColor(y%20==0 ? nColor01 : nColor02);

    int nX = 0, nY = 0;
    nX = x + rand.nextInt(20);
    nY = y;

    int nSize = rand.nextInt(20)+2;
    sRect.set(nX, nY, nX+nSize, nY+nSize);
    csCanvas.drawRect(sRect, csPaint);
   }
  }

  int y=280;
  {
   for(x=0; x<=320; x+=10)
   {
    csPaint.setColor(x%20==0 ? nColor01 : nColor02);

    int nX = 0, nY = 0;
    nX = x;
    nY = y + rand.nextInt(20);

    int nSize = rand.nextInt(20)+2;
    sRect.set(nX, nY, nX+nSize, nY+nSize);
    csCanvas.drawRect(sRect, csPaint);
   }
  }

 }
四角模様(上下)

こちらも良い名前が思いつかなかったので、良いタイトルがあればコメントください(^^;
今度は四角形を上下に四角形を描画しています。
ひし形を描画するため、まずはキャンパスを45度ずらした後上側と下側になる場所に色とサイズを変えながら四角形を描画していきます。
今回は色を変えて描画しましたが、アプリにあわせて色を統一しても使える背景かと思います(^^)
 // キャンパスを回転させて四角形を描画
 public void DrawBackground013(Canvas csCanvas)
 {
  Random rand = new Random();
  csCanvas.rotate(45, 160, 160);

  Paint csPaint = new Paint();
  csPaint.setAntiAlias(true);
  csPaint.setColor(Color.argb(128+rand.nextInt(80),rand.nextInt(256),rand.nextInt(256),rand.nextInt(256)));

  RectF sRect = new RectF();
  for(int x=0; x<=160; x+=20)
  {
   csPaint.setColor(Color.argb(128+rand.nextInt(80),rand.nextInt(256),rand.nextInt(256),rand.nextInt(256)));
   for(int y=0; y<=320; y+=30)
   {
    int nX = 0, nY = 0;
    nX =   0 + x + rand.nextInt(90) - 90;
    nY = 160 - x + rand.nextInt(90) - 90;

    int nSize = rand.nextInt(30)+2;
    sRect.set(nX, nY, nX+nSize, nY+nSize);
    csCanvas.drawRect(sRect, csPaint);
   }
  }

  for(int x=0; x<=160; x+=20)
  {
   csPaint.setColor(Color.argb(128+rand.nextInt(80),rand.nextInt(256),rand.nextInt(256),rand.nextInt(256)));
   for(int y=0; y<=320; y+=30)
   {
    int nX = 0, nY = 0;
    nX = 160 + x - rand.nextInt(90) + 60;
    nY = 320 - x - rand.nextInt(90) + 60;

    int nSize = rand.nextInt(30)+2;
    sRect.set(nX, nY, nX+nSize, nY+nSize);
    csCanvas.drawRect(sRect, csPaint);
   }
  }

 }
四角模様(真ん中)
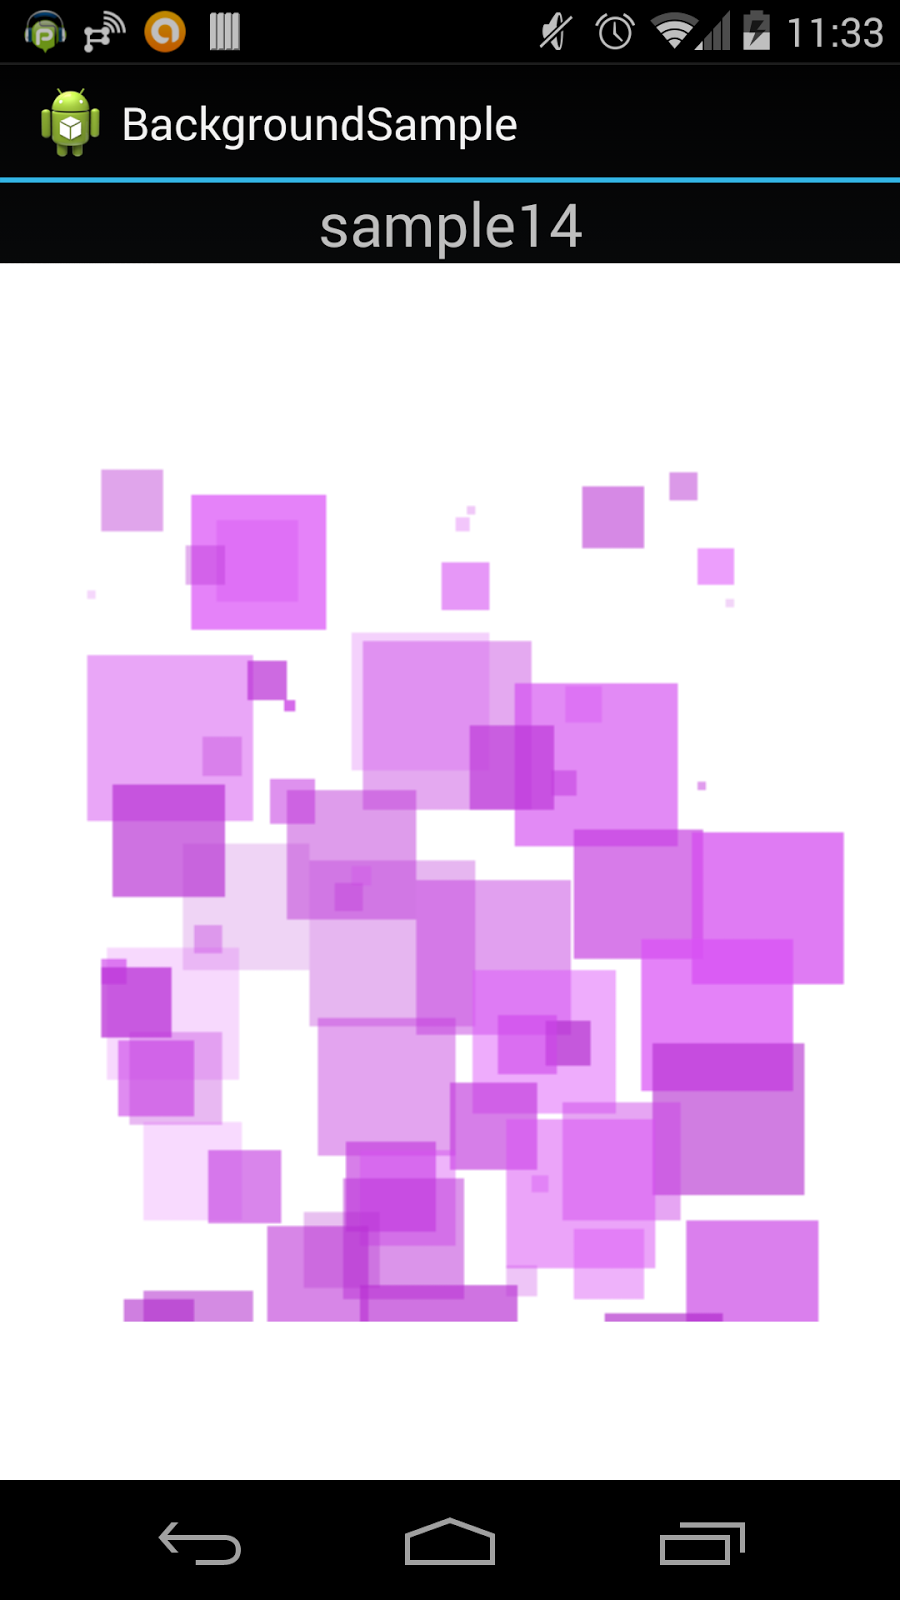
こちらも良い名前が思いつかなかったので、良いタイトルがあればコメントください(^^;
四角形を大小それぞれ描画しています。
もう少し真ん中のラインに沿って大きめのサイズももう少し増やせるとより見栄えが良くなる気がしますが、とりあえずこれで完成させました(^O^;
 // 四角形の描画
 public void DrawBackground014(Canvas csCanvas)
 {
  Random rand = new Random();
  //csCanvas.rotate(45, 160, 160);

  int nColorR = rand.nextInt(256);
  int nColorG = rand.nextInt(256);
  int nColorB = rand.nextInt(256);
  Paint csPaint = new Paint();
  csPaint.setAntiAlias(true);
  csPaint.setColor(Color.argb(128+rand.nextInt(80),nColorR,nColorG,nColorB));

  RectF sRect = new RectF();
  {
   for(int y=0; y<=320; y+=5)
   {
    int nAddColor = rand.nextInt(50);
    csPaint.setColor(Color.argb(50+rand.nextInt(150),nColorR+nAddColor,nColorG+nAddColor,nColorB+nAddColor));

    int nX = 0, nY = 0;
    nX = 20 + rand.nextInt(240);
    nY = y + rand.nextInt(20);

    int nSize = rand.nextInt(60)+2;
    sRect.set(nX, nY, nX+nSize, nY+nSize);
    csCanvas.drawRect(sRect, csPaint);
   }
  }

 }
GitHubでの公開
今回このプロジェクトをGitHubで公開しましたので、興味をお持ちいただいた方は下記リンクからプロジェクトをご確認ください(^O^)/
❏BackgroundSample
また背景を追加した際にはアプリとプロジェクトを更新してブログで紹介していきたいと思います♪
0 件のコメント:
コメントを投稿